

Growing Resources
How to Germinate Cannabis Seeds

There are many methods growers use to germinate cannabis seeds. While many work for some seeds they do not work for all.
We recommend just keeping it simple for the best success in sprouting seeds.
Cannabis Seed Germination
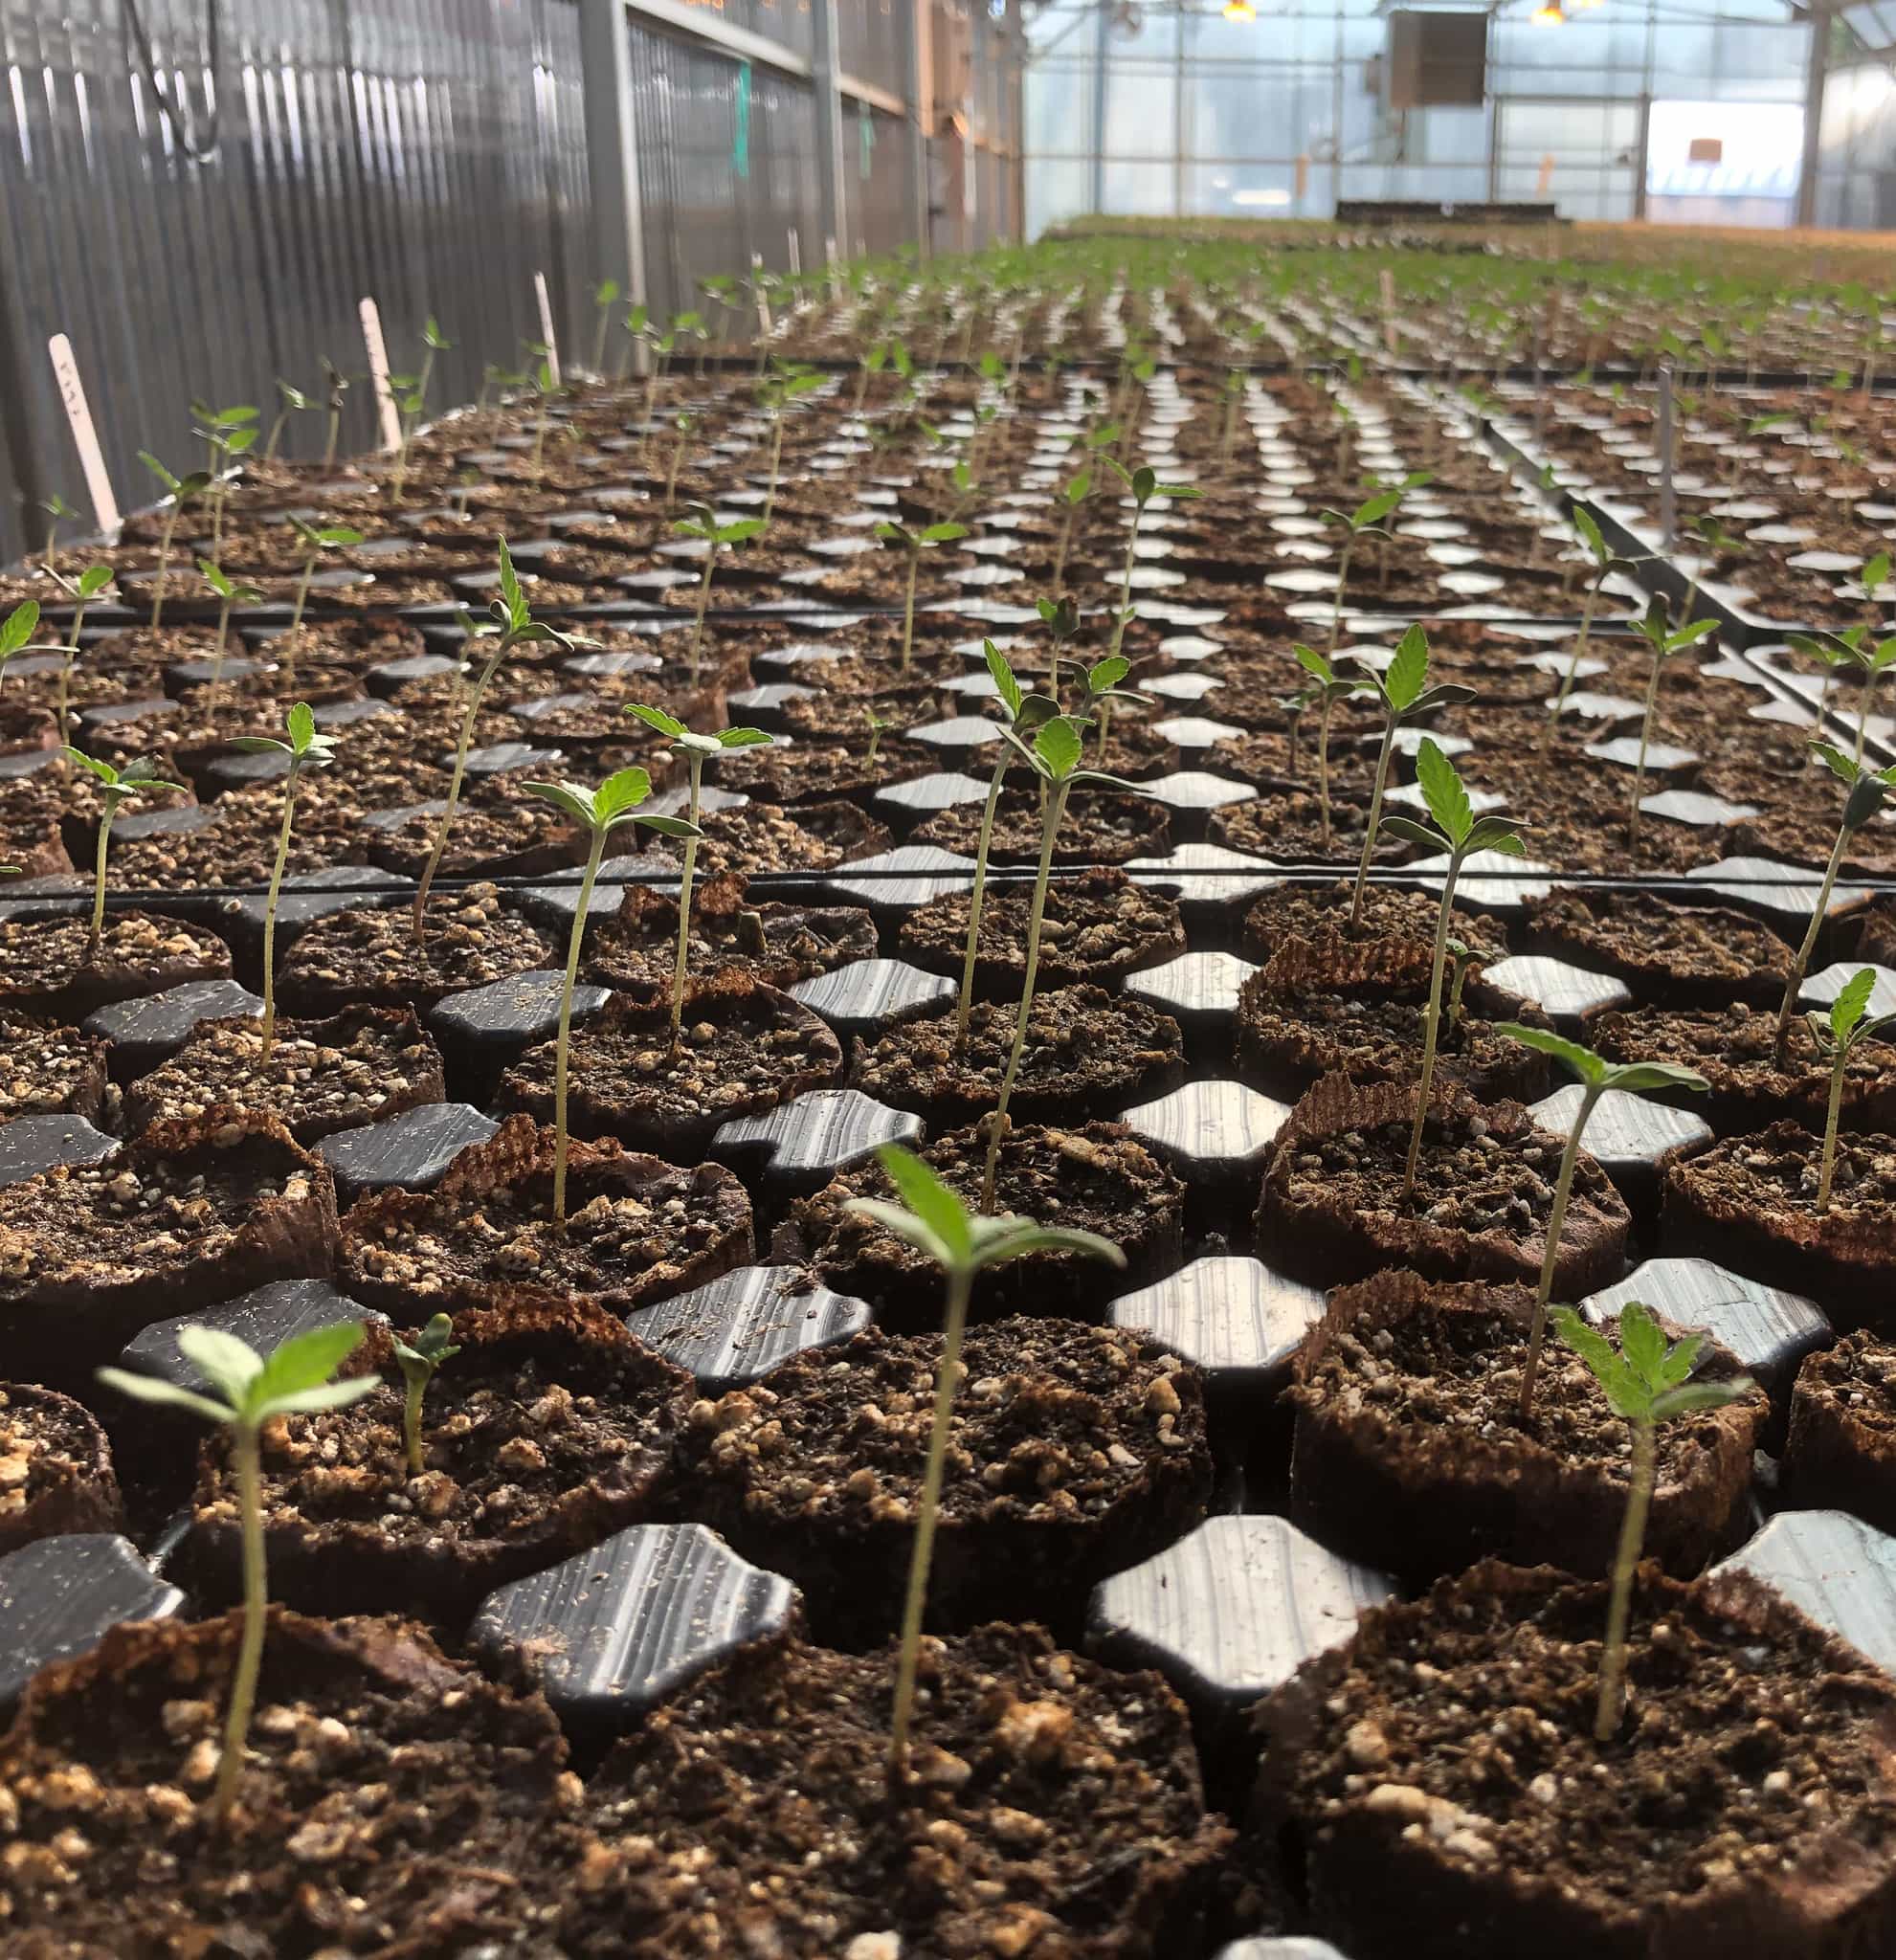
Start cannabis seeds directly in clean, well-draining potting soil - and ideally in a greenhouse for outdoor production. Do not reuse old potting soil for seed starting. We discourage pre-soaking seeds or wet paper towel drenches prior to planting. These methods may work for some, they cause issues for others. We do not recommend using soil-less mediums such as peat pods or rockwool cubes.
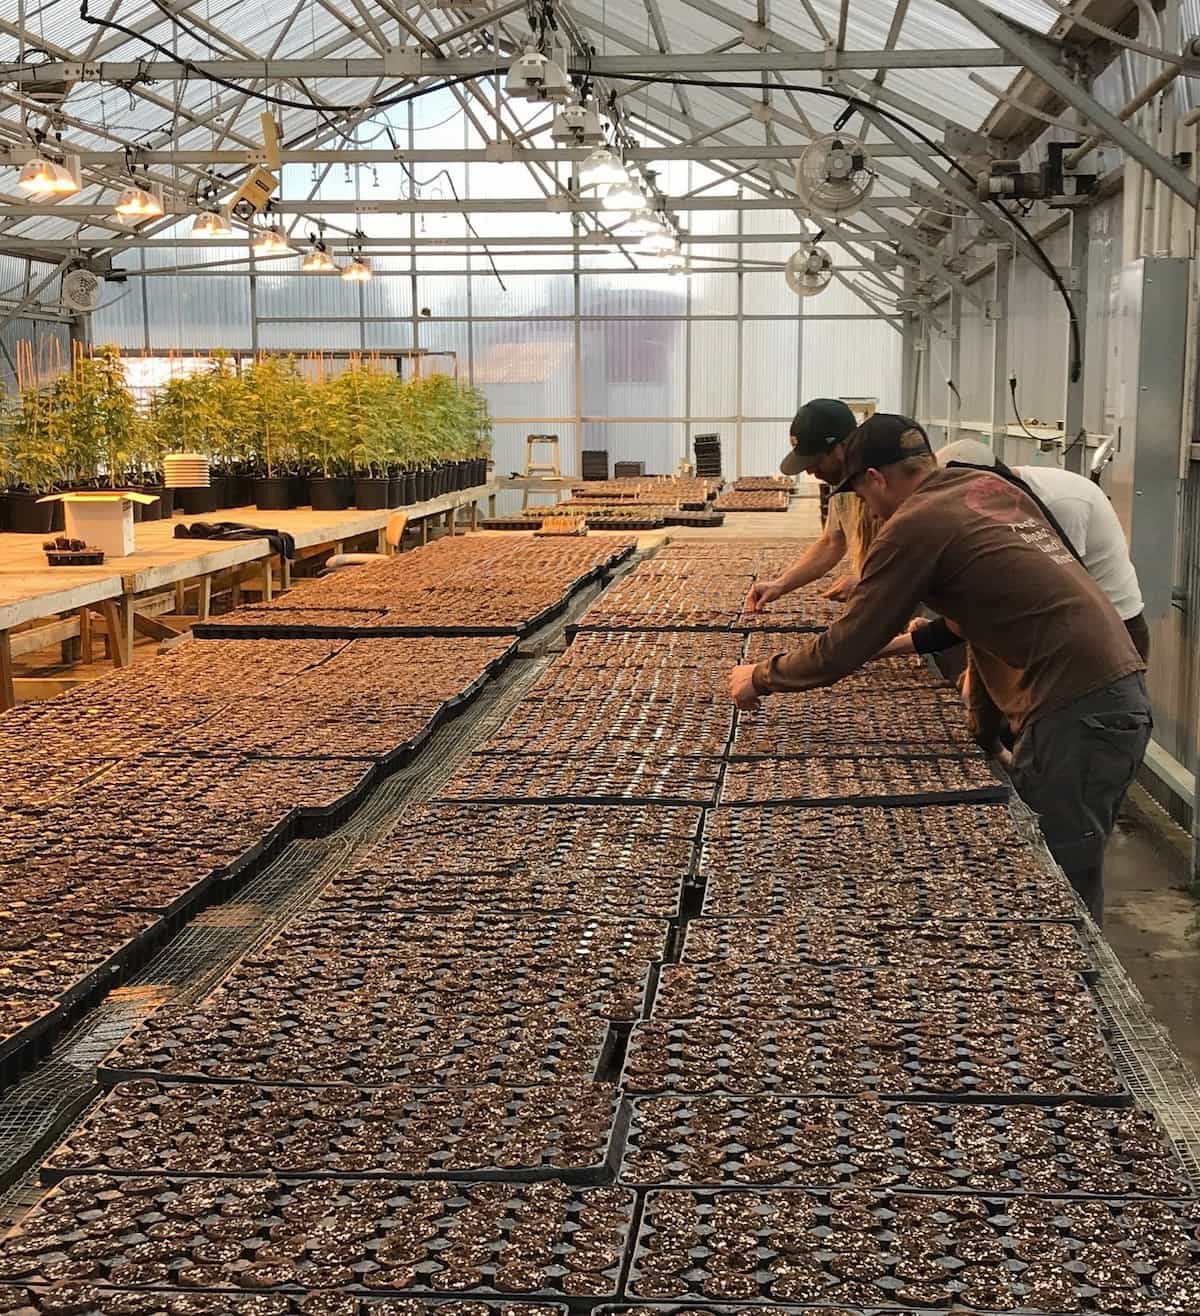
We use a small stick with with a measured mark to poke 1/4" holes into the soil. Seeds are placed gently into the hole, and covered lightly with soil. We follow it up by watering in gently. Heavy watering can float the seed to the surface and we use a mister attachment to ensure seeds are not disturbed. Do not plant seeds too deep as they will struggle to break the surface.
Keep temperatures between 70-90°F/21-31°C and keep the soil moist but not wet. Be vigilant in checking soil moisture levels. If soil becomes overly dry seedlings will die. Too much water and they will rot. We do not recommend using domes as they can cause excess moisture - which can cause seedlings to rot. Heat mat's may also cause issues drying out soil too quickly, starting in a warm environment is ideal.

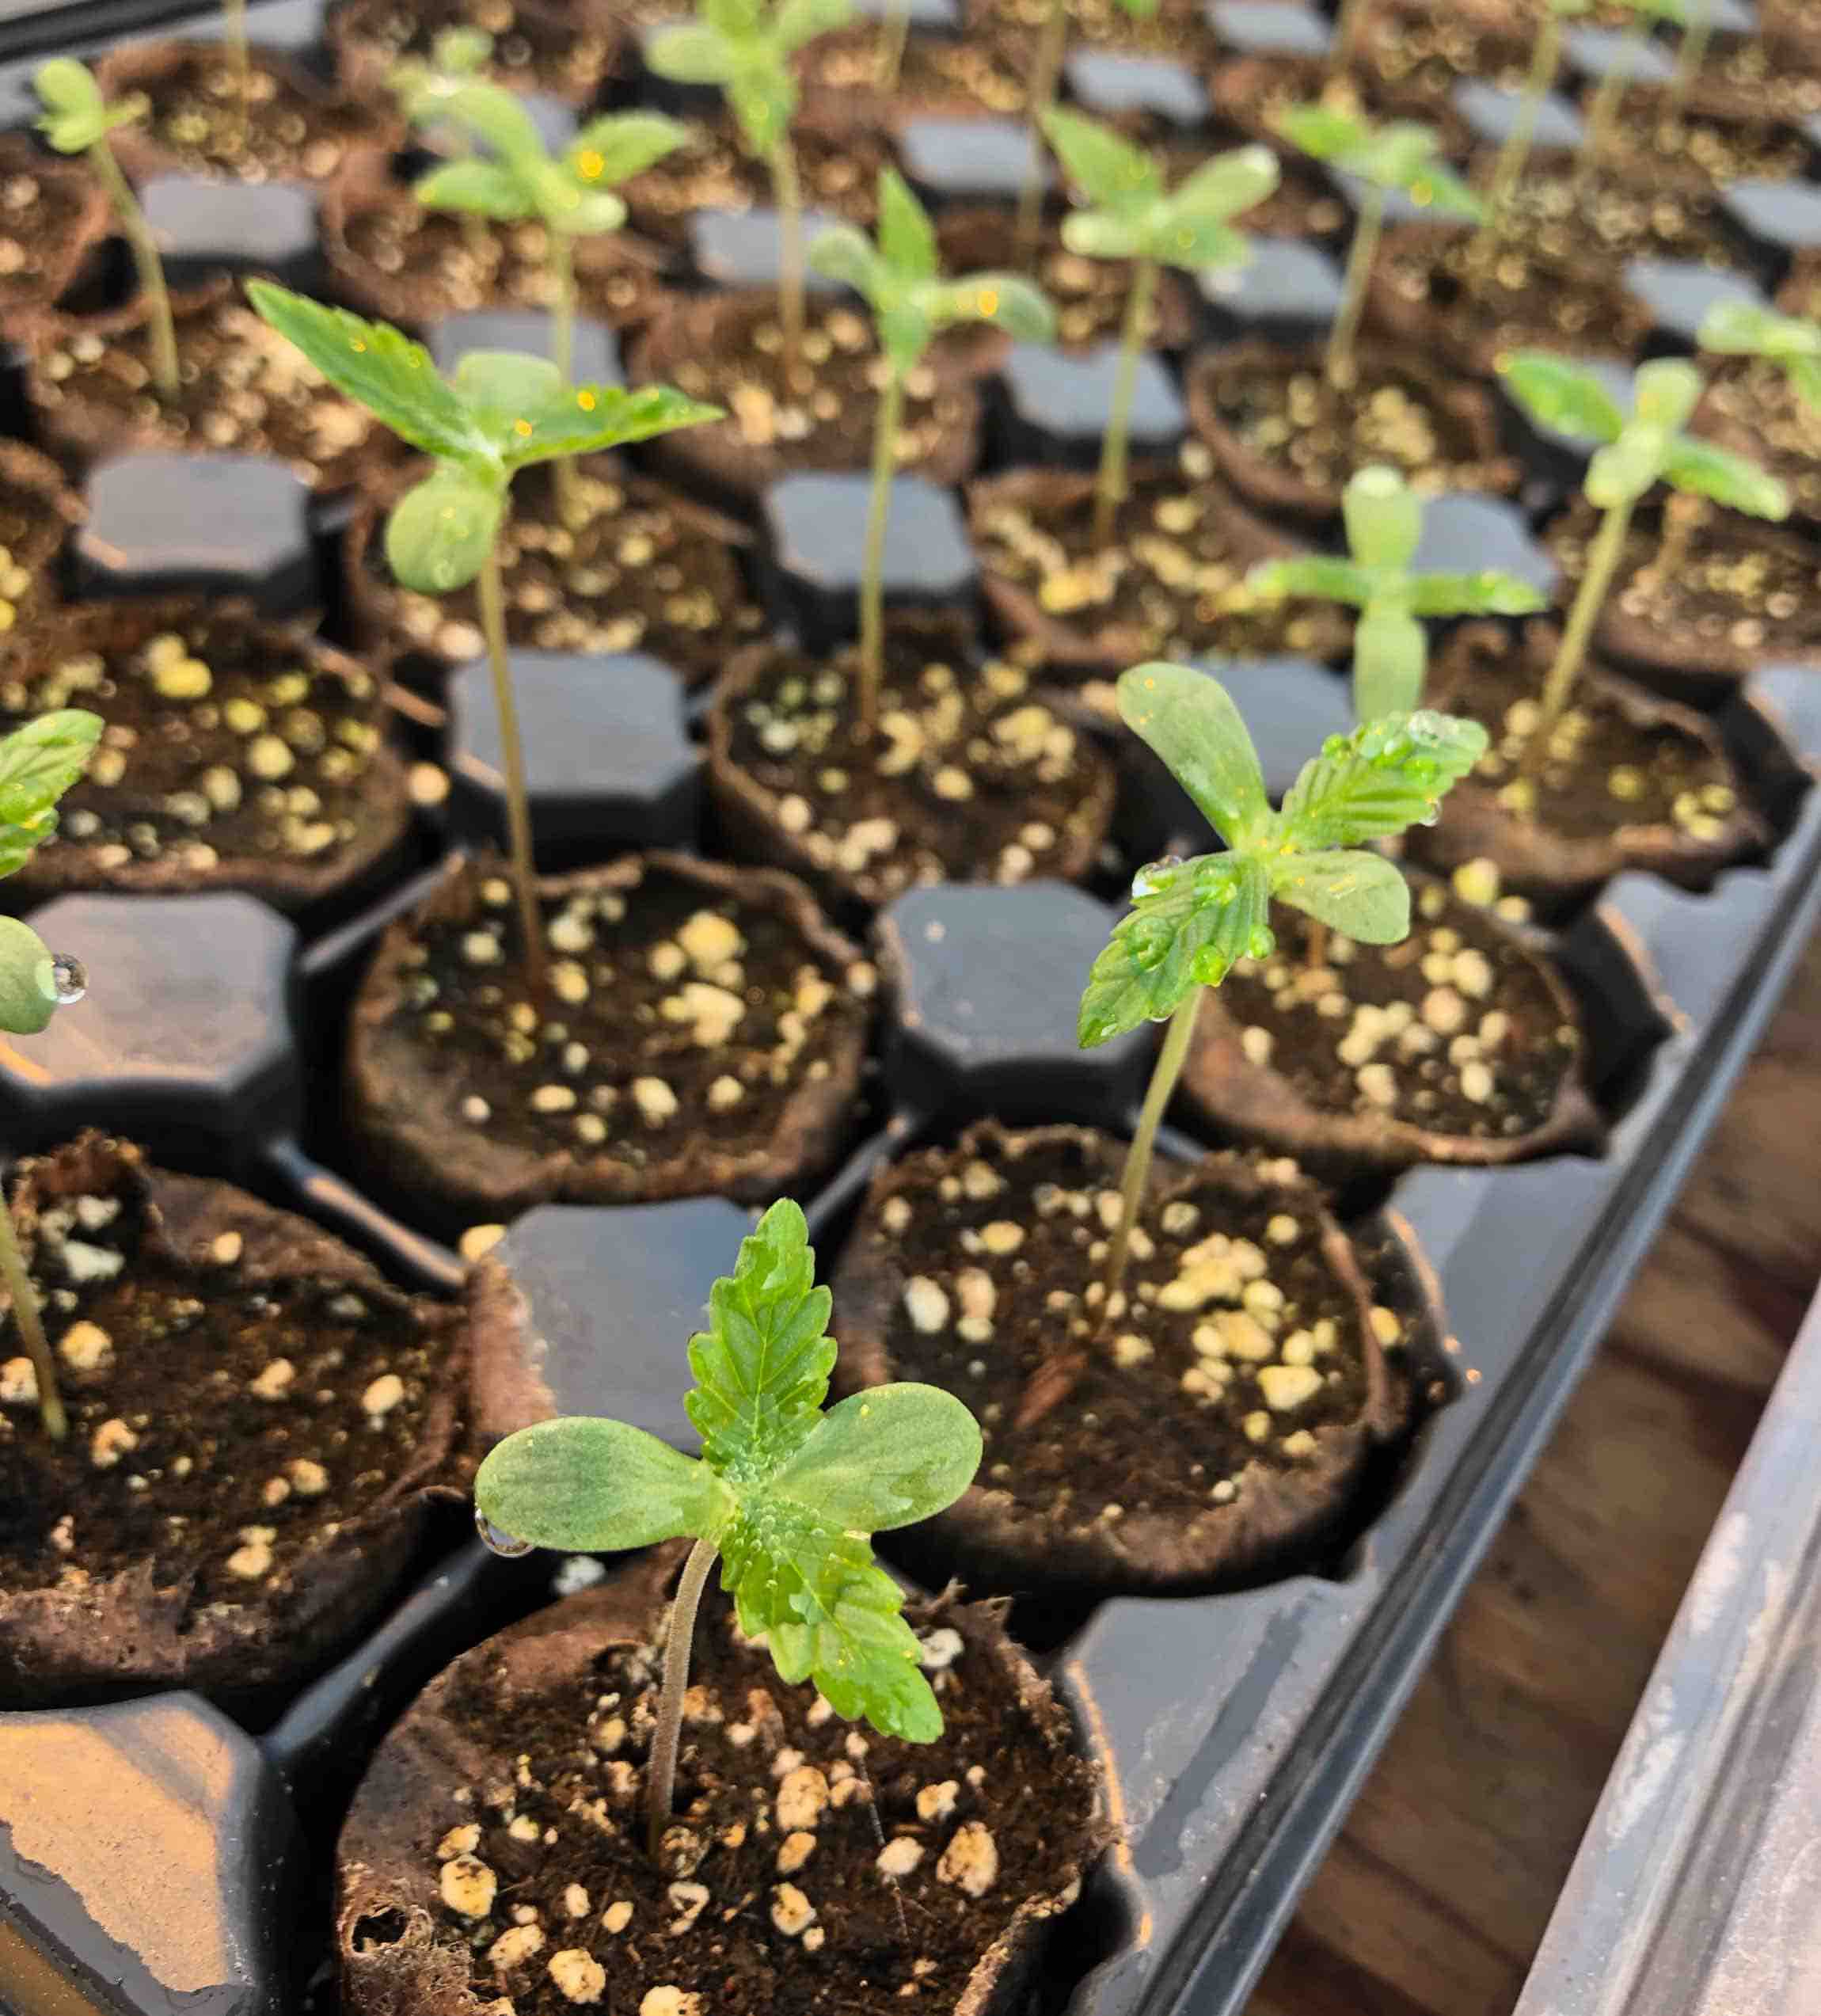
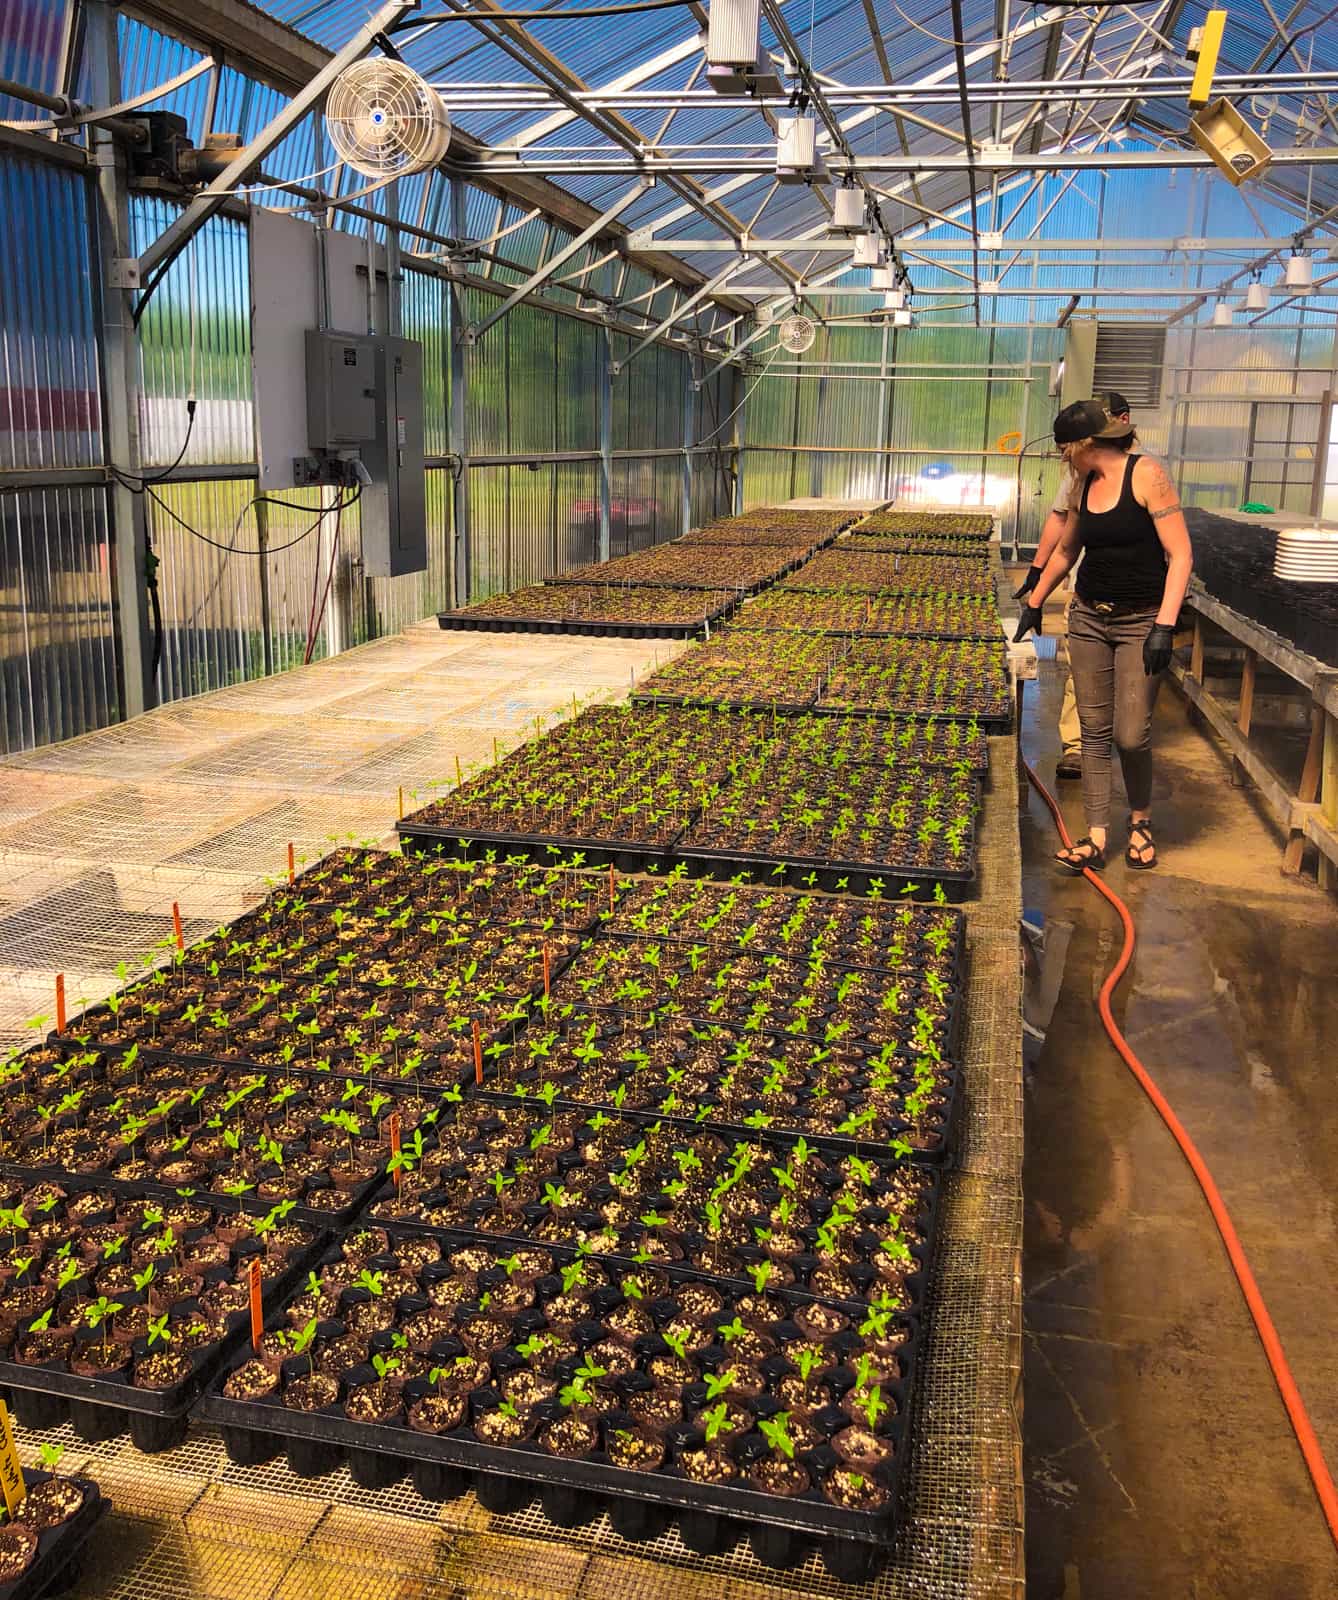
We use 50 and 72 cell vegetable starter trays with depths of 3” and cells between 1-2" squares. These trays hold around 4-5 quarts of soil and provide plants with enough space to grow for a few weeks before becoming root bound. Solo cups or 4x4 pots are also an excellent choice.
We recommend feeding plants a liquid fish emulsion after they've been above ground for about 2 weeks, or if leaves are yellowing from malnutrition. Start with half dose of what the label recommends as seedlings are delicate. We start with a liquid fish emulsion at a half dose.
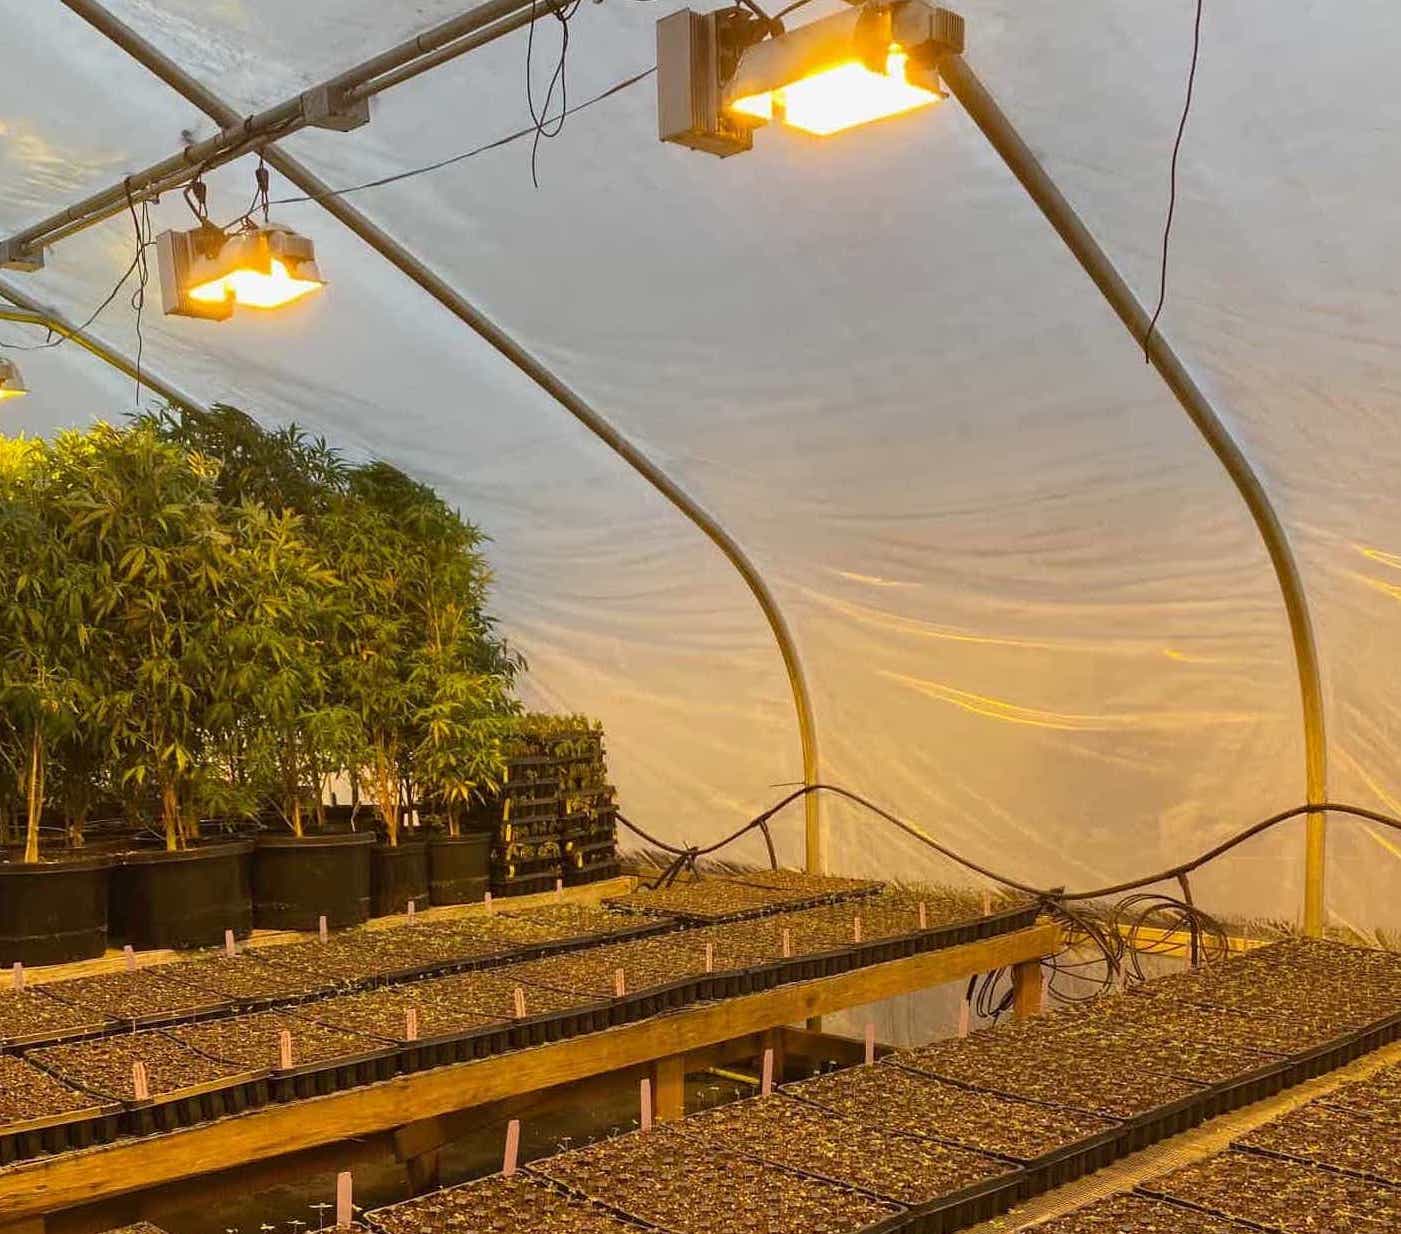
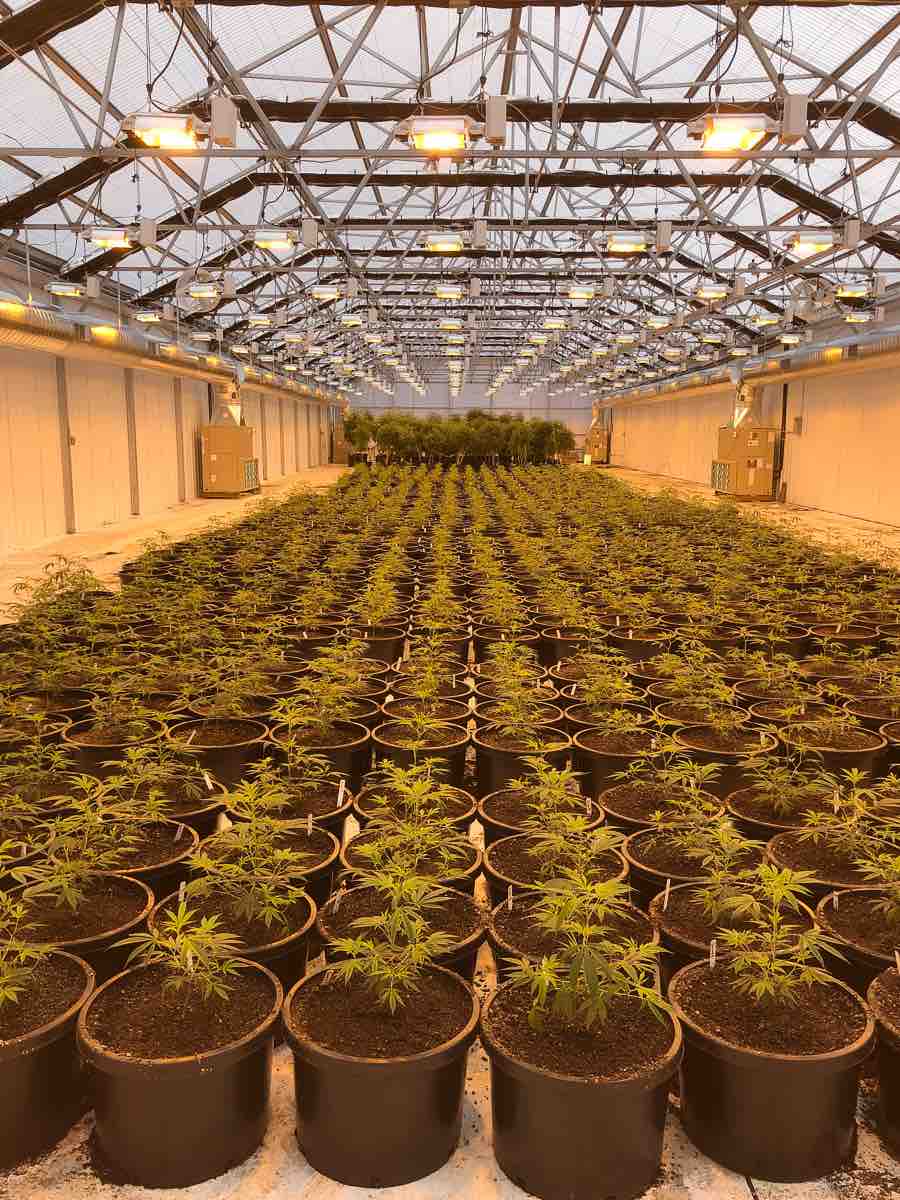
We use high intensity lights to supplement in our greenhouses. This prevents seedlings from growing spindly and weak. Low output lights, particularily indoors will cause seedlings to grow very spindly. Do not use CFL lights to start seeds.
How to Germinate Autoflower Seeds
Autoflower cannabis seeds are extremely sensitive in their early stages of life and require constant attention. They are essentially hardwired to flower at the first signs of stress.
The goal as a grower is to keep them as happy as possible for maximum growth before they finish flowering.
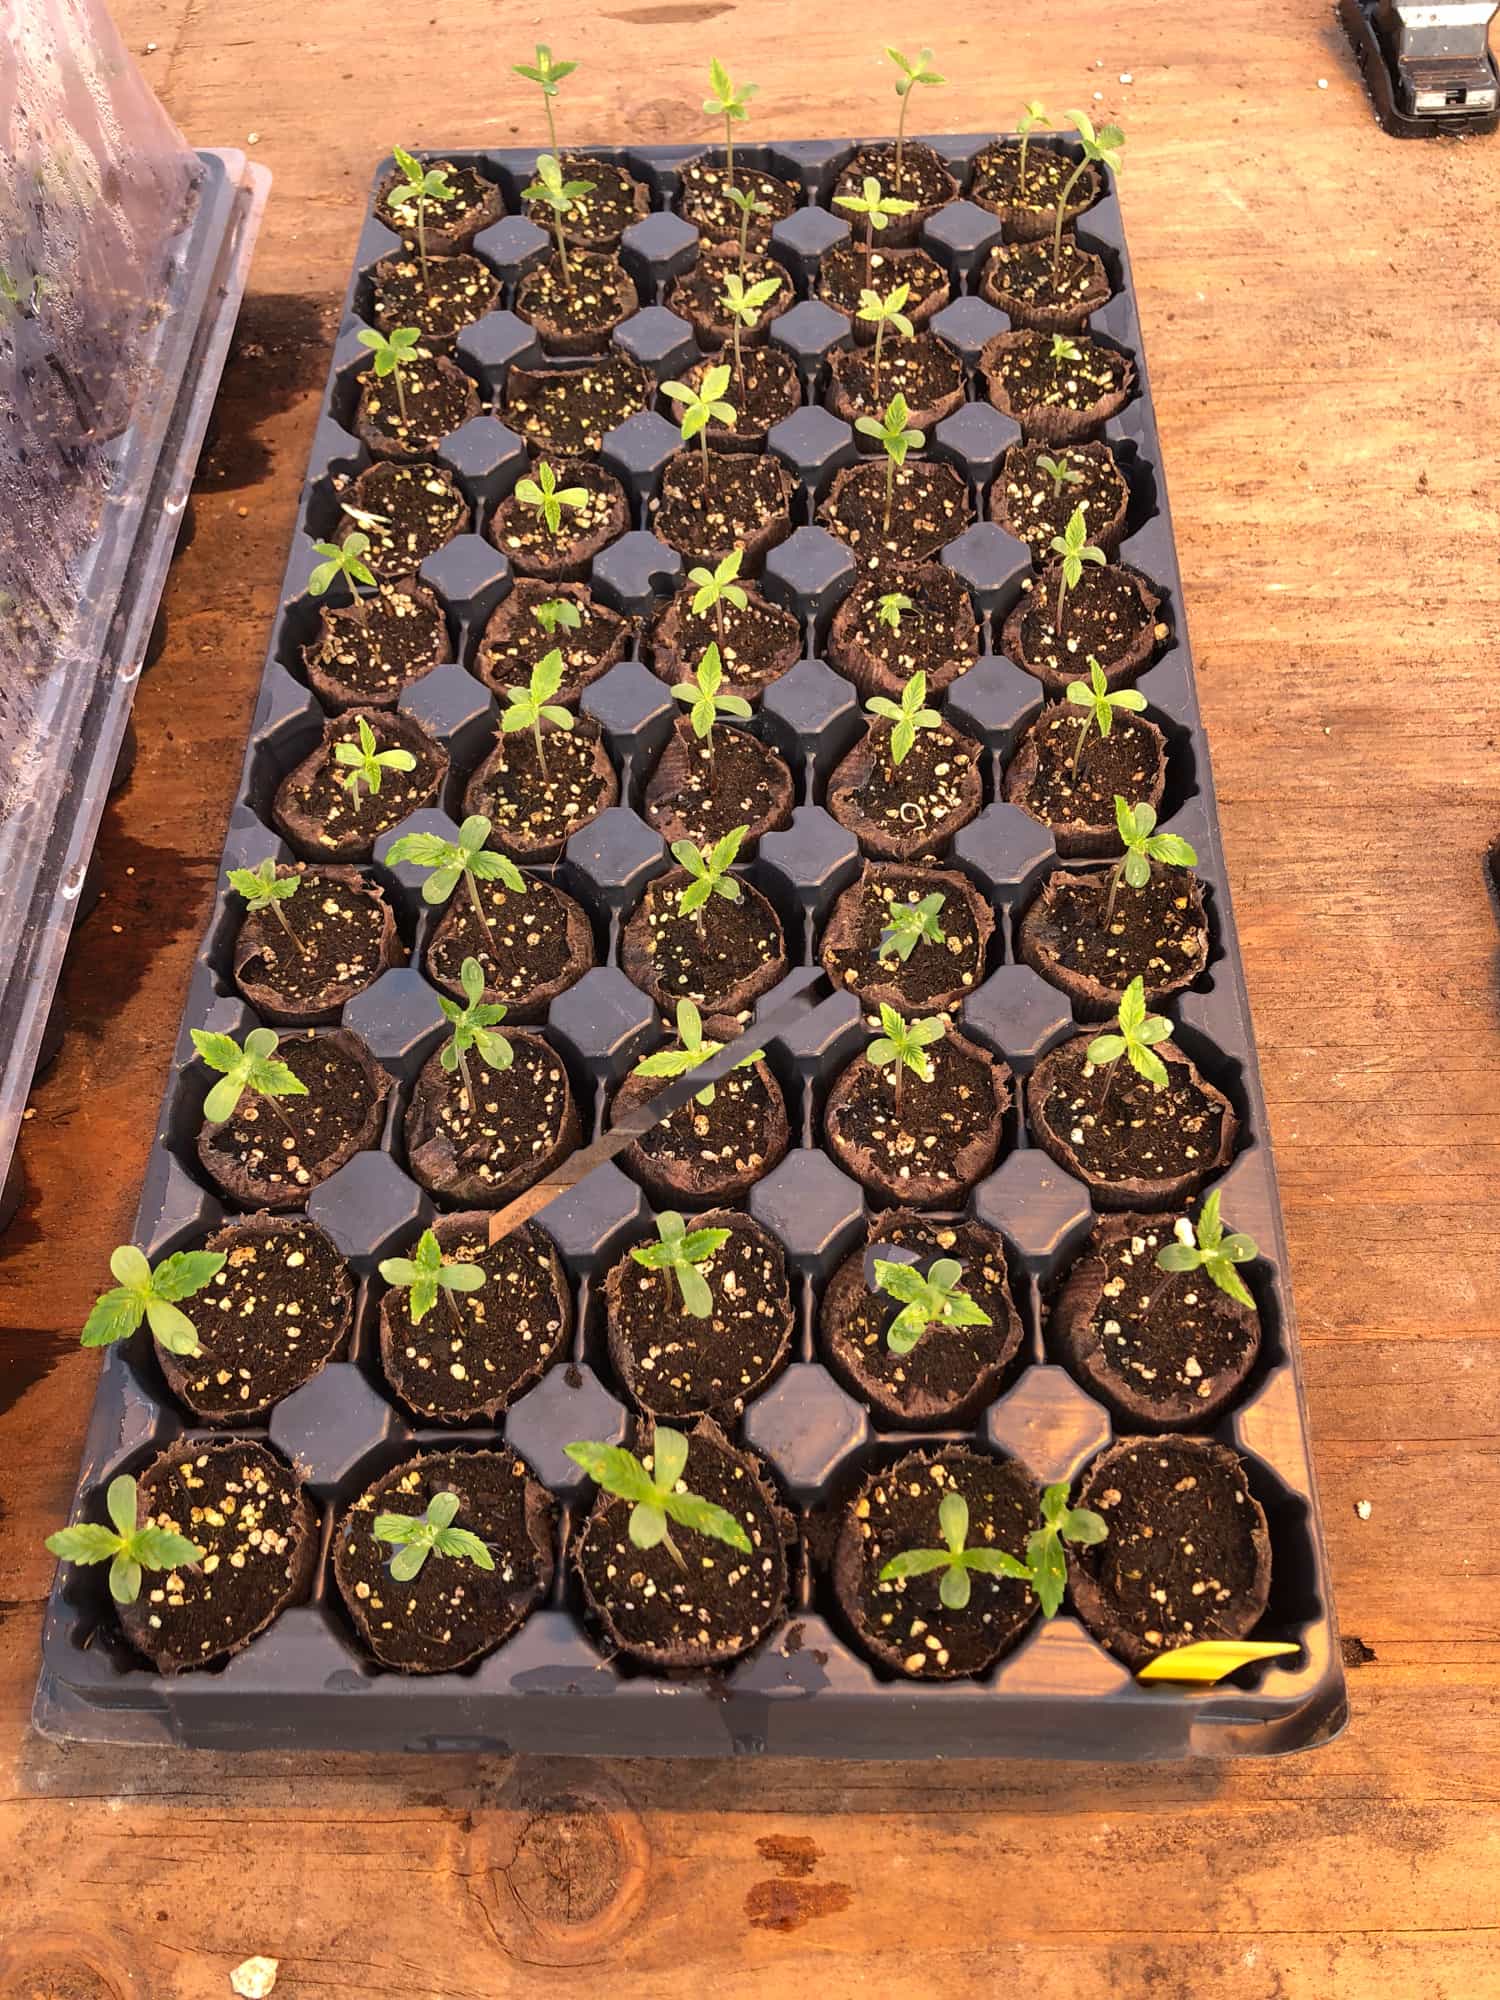
We suggest either planting seeds in the container you intend to flower them out in or root them in an easily transferable plug. We use 50 cell trays loaded with Earth Pots (available from www.obcnw.com).
These plugs (pictured above) allow for easy plant removal and minimal transplant shock. Transplant shock is a stressor. Seeds are planted ¼” and covered lightly with soil.
Like all seed, water in gently and ensure constant moisture. Do not over-water. Keep temperatures above 68°F, and between 75-85°F for fastest germination rates.

During all hours of darkness, and when temperatures allow, we light supplement our autoflower seedlings with high intensity lights. This isn't essential but it will give starts a strong beginning and can help keep conditions warm.
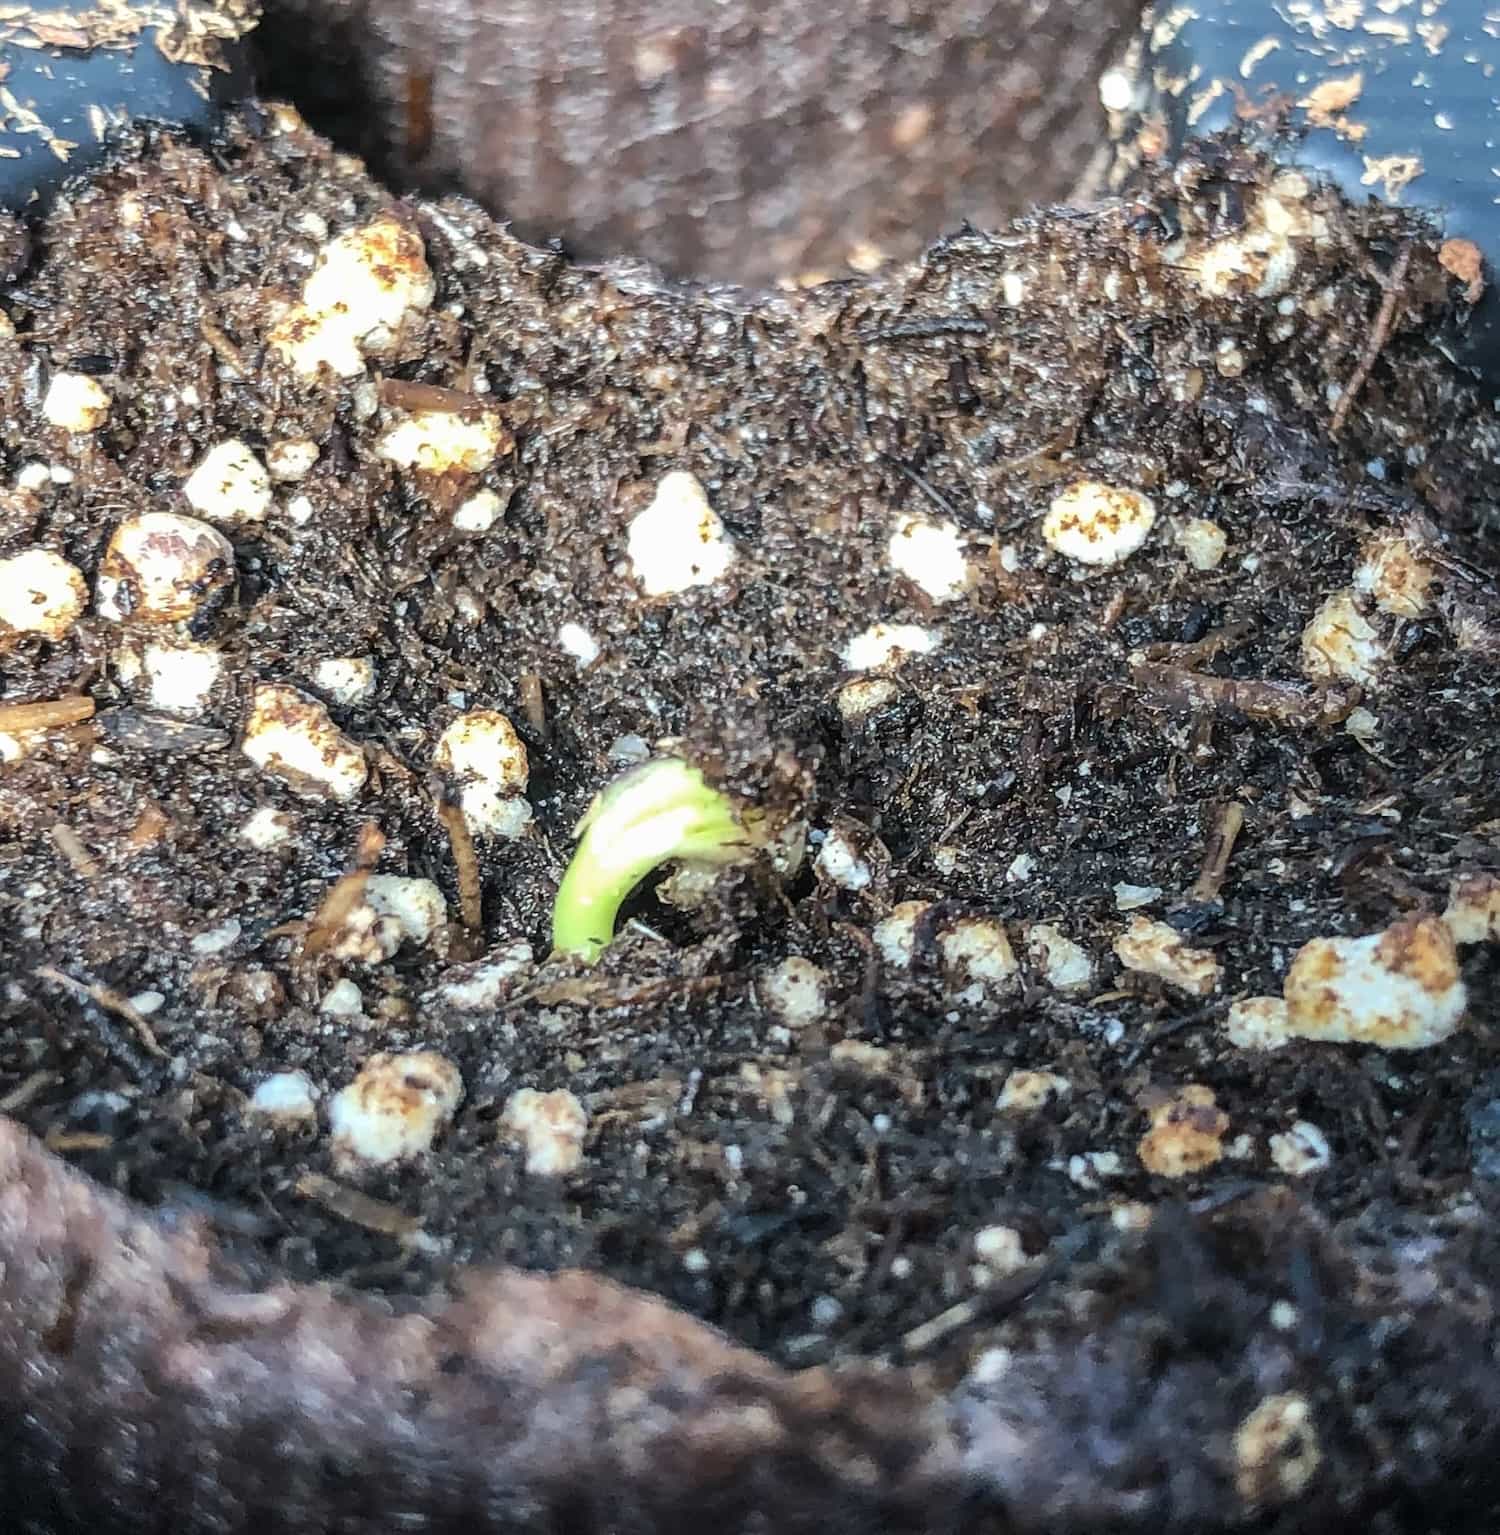
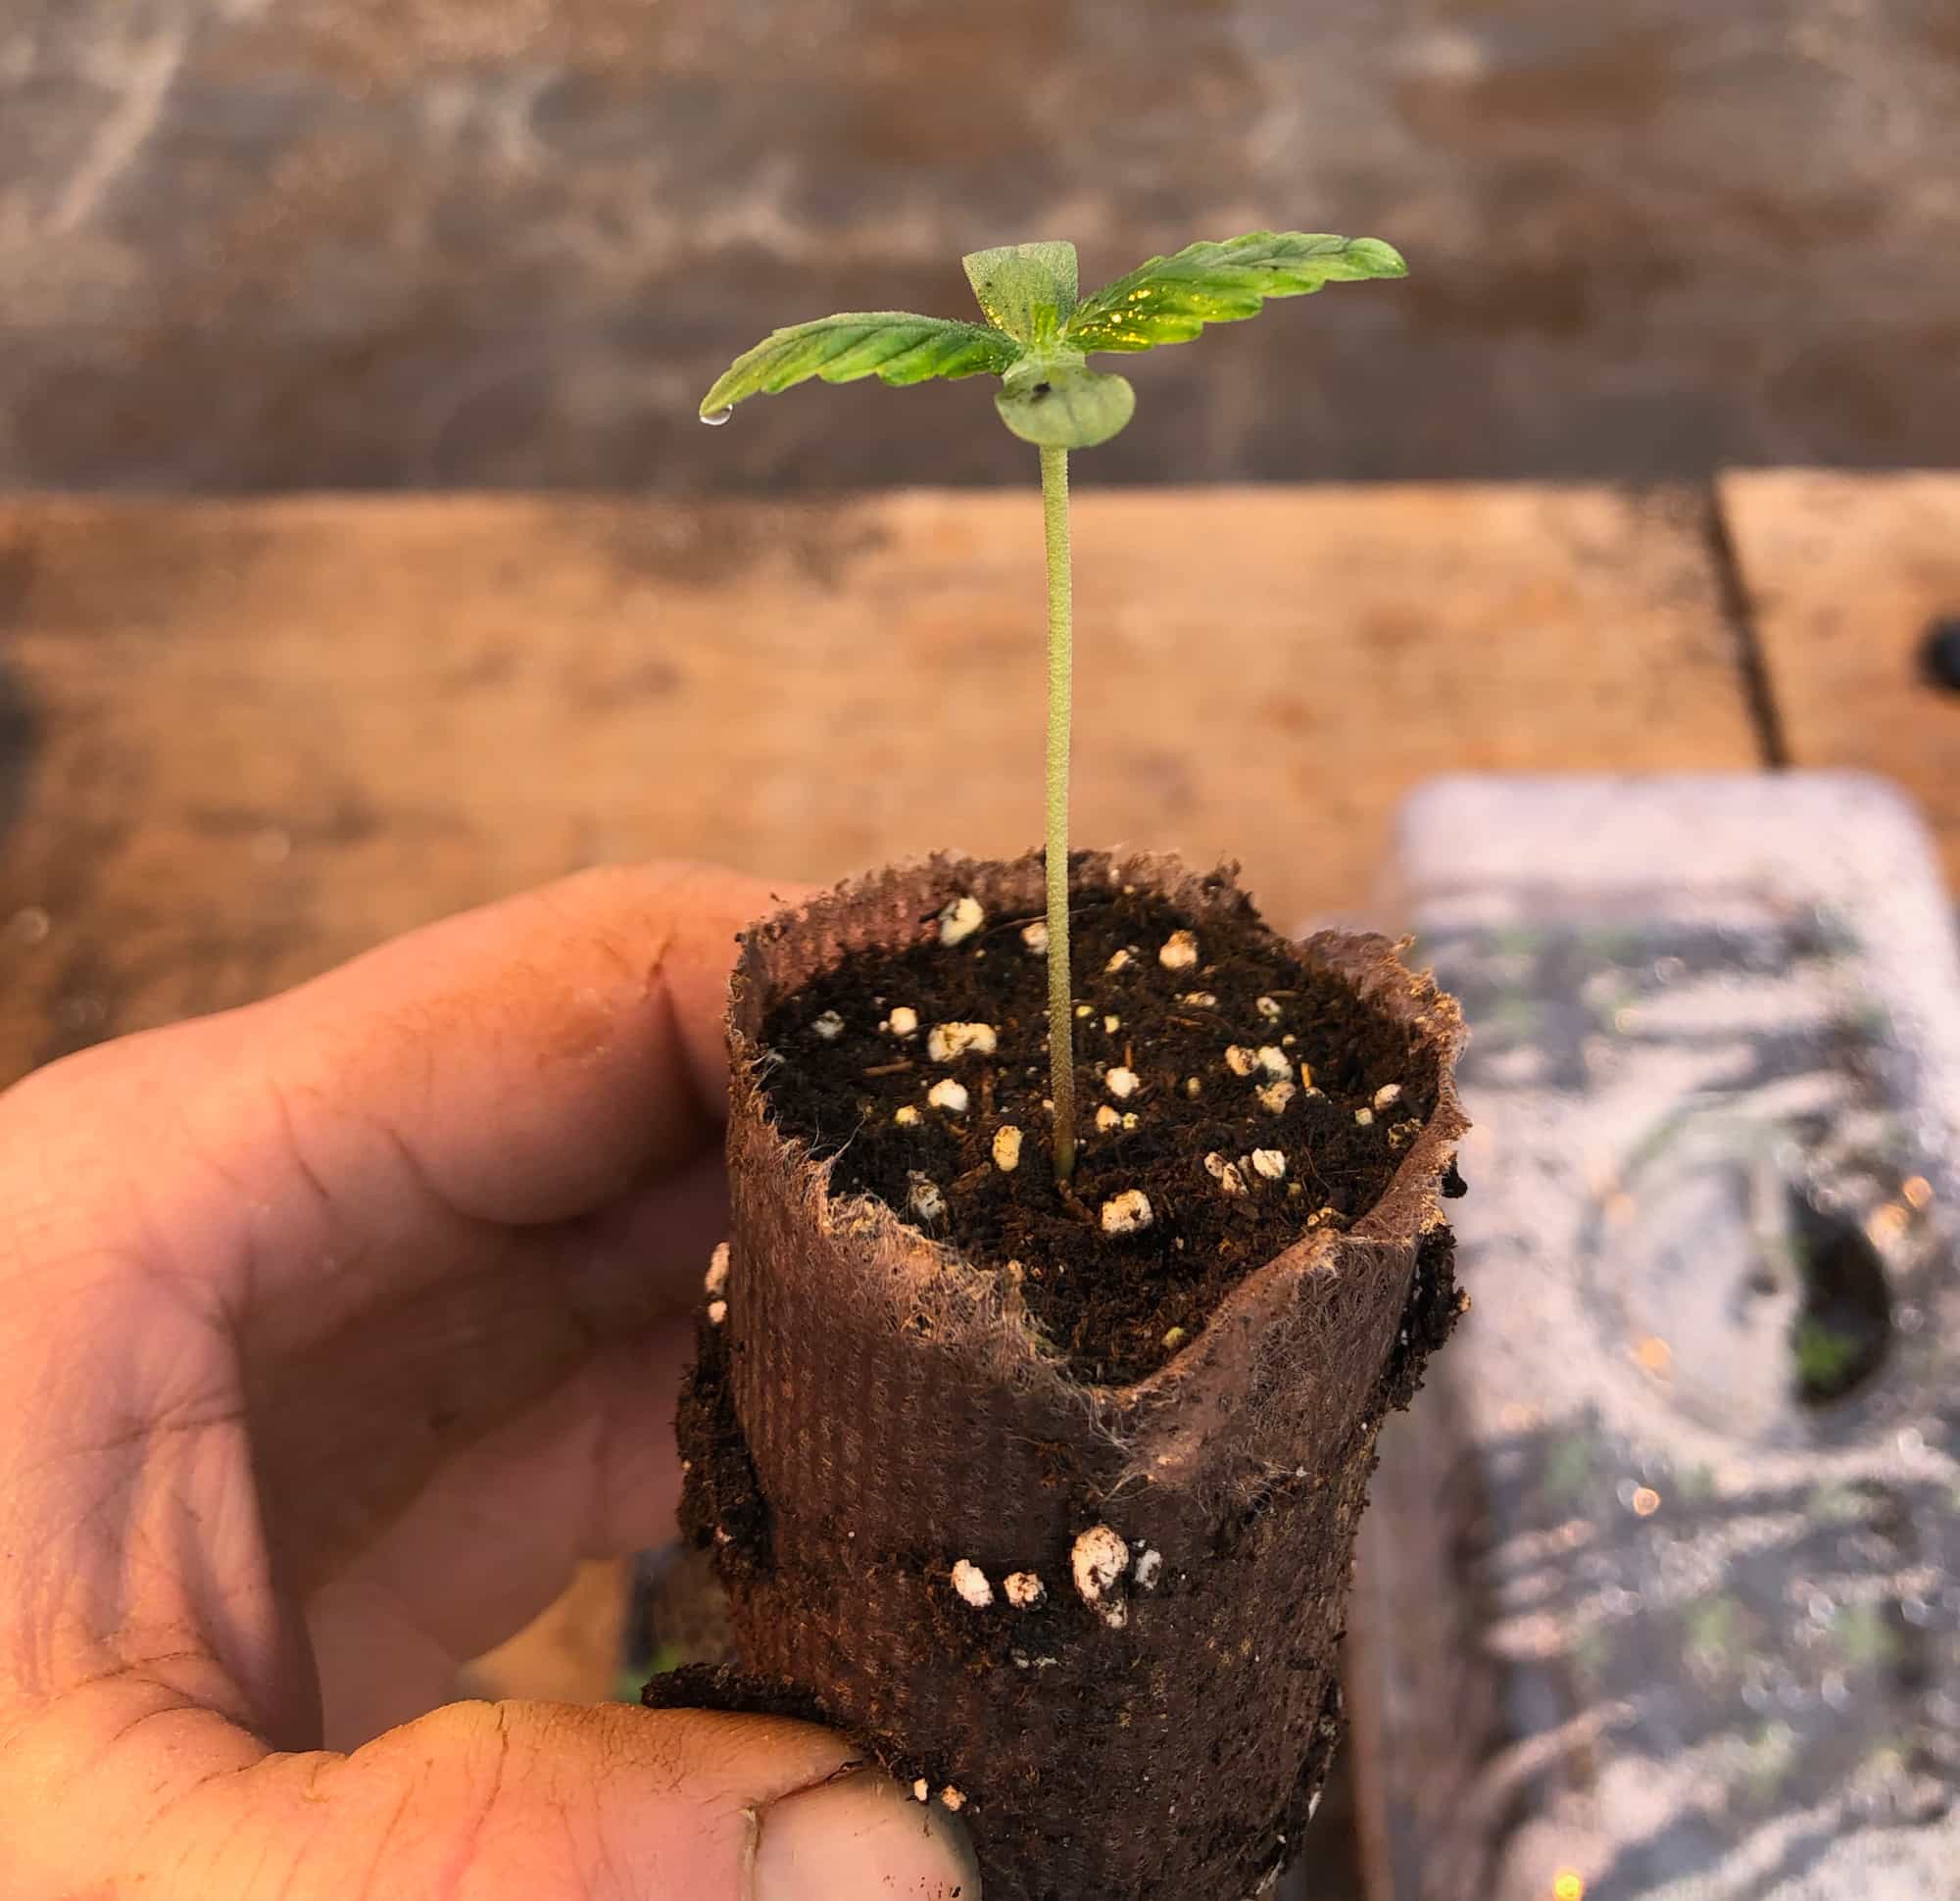
The most important step in growing autoflowering genetics is transplanting seedlings as soon as, or before roots reach the bottoms of plugs, usually within 7 days of soil emergence. When plants are only inches tall. This height is recommended.
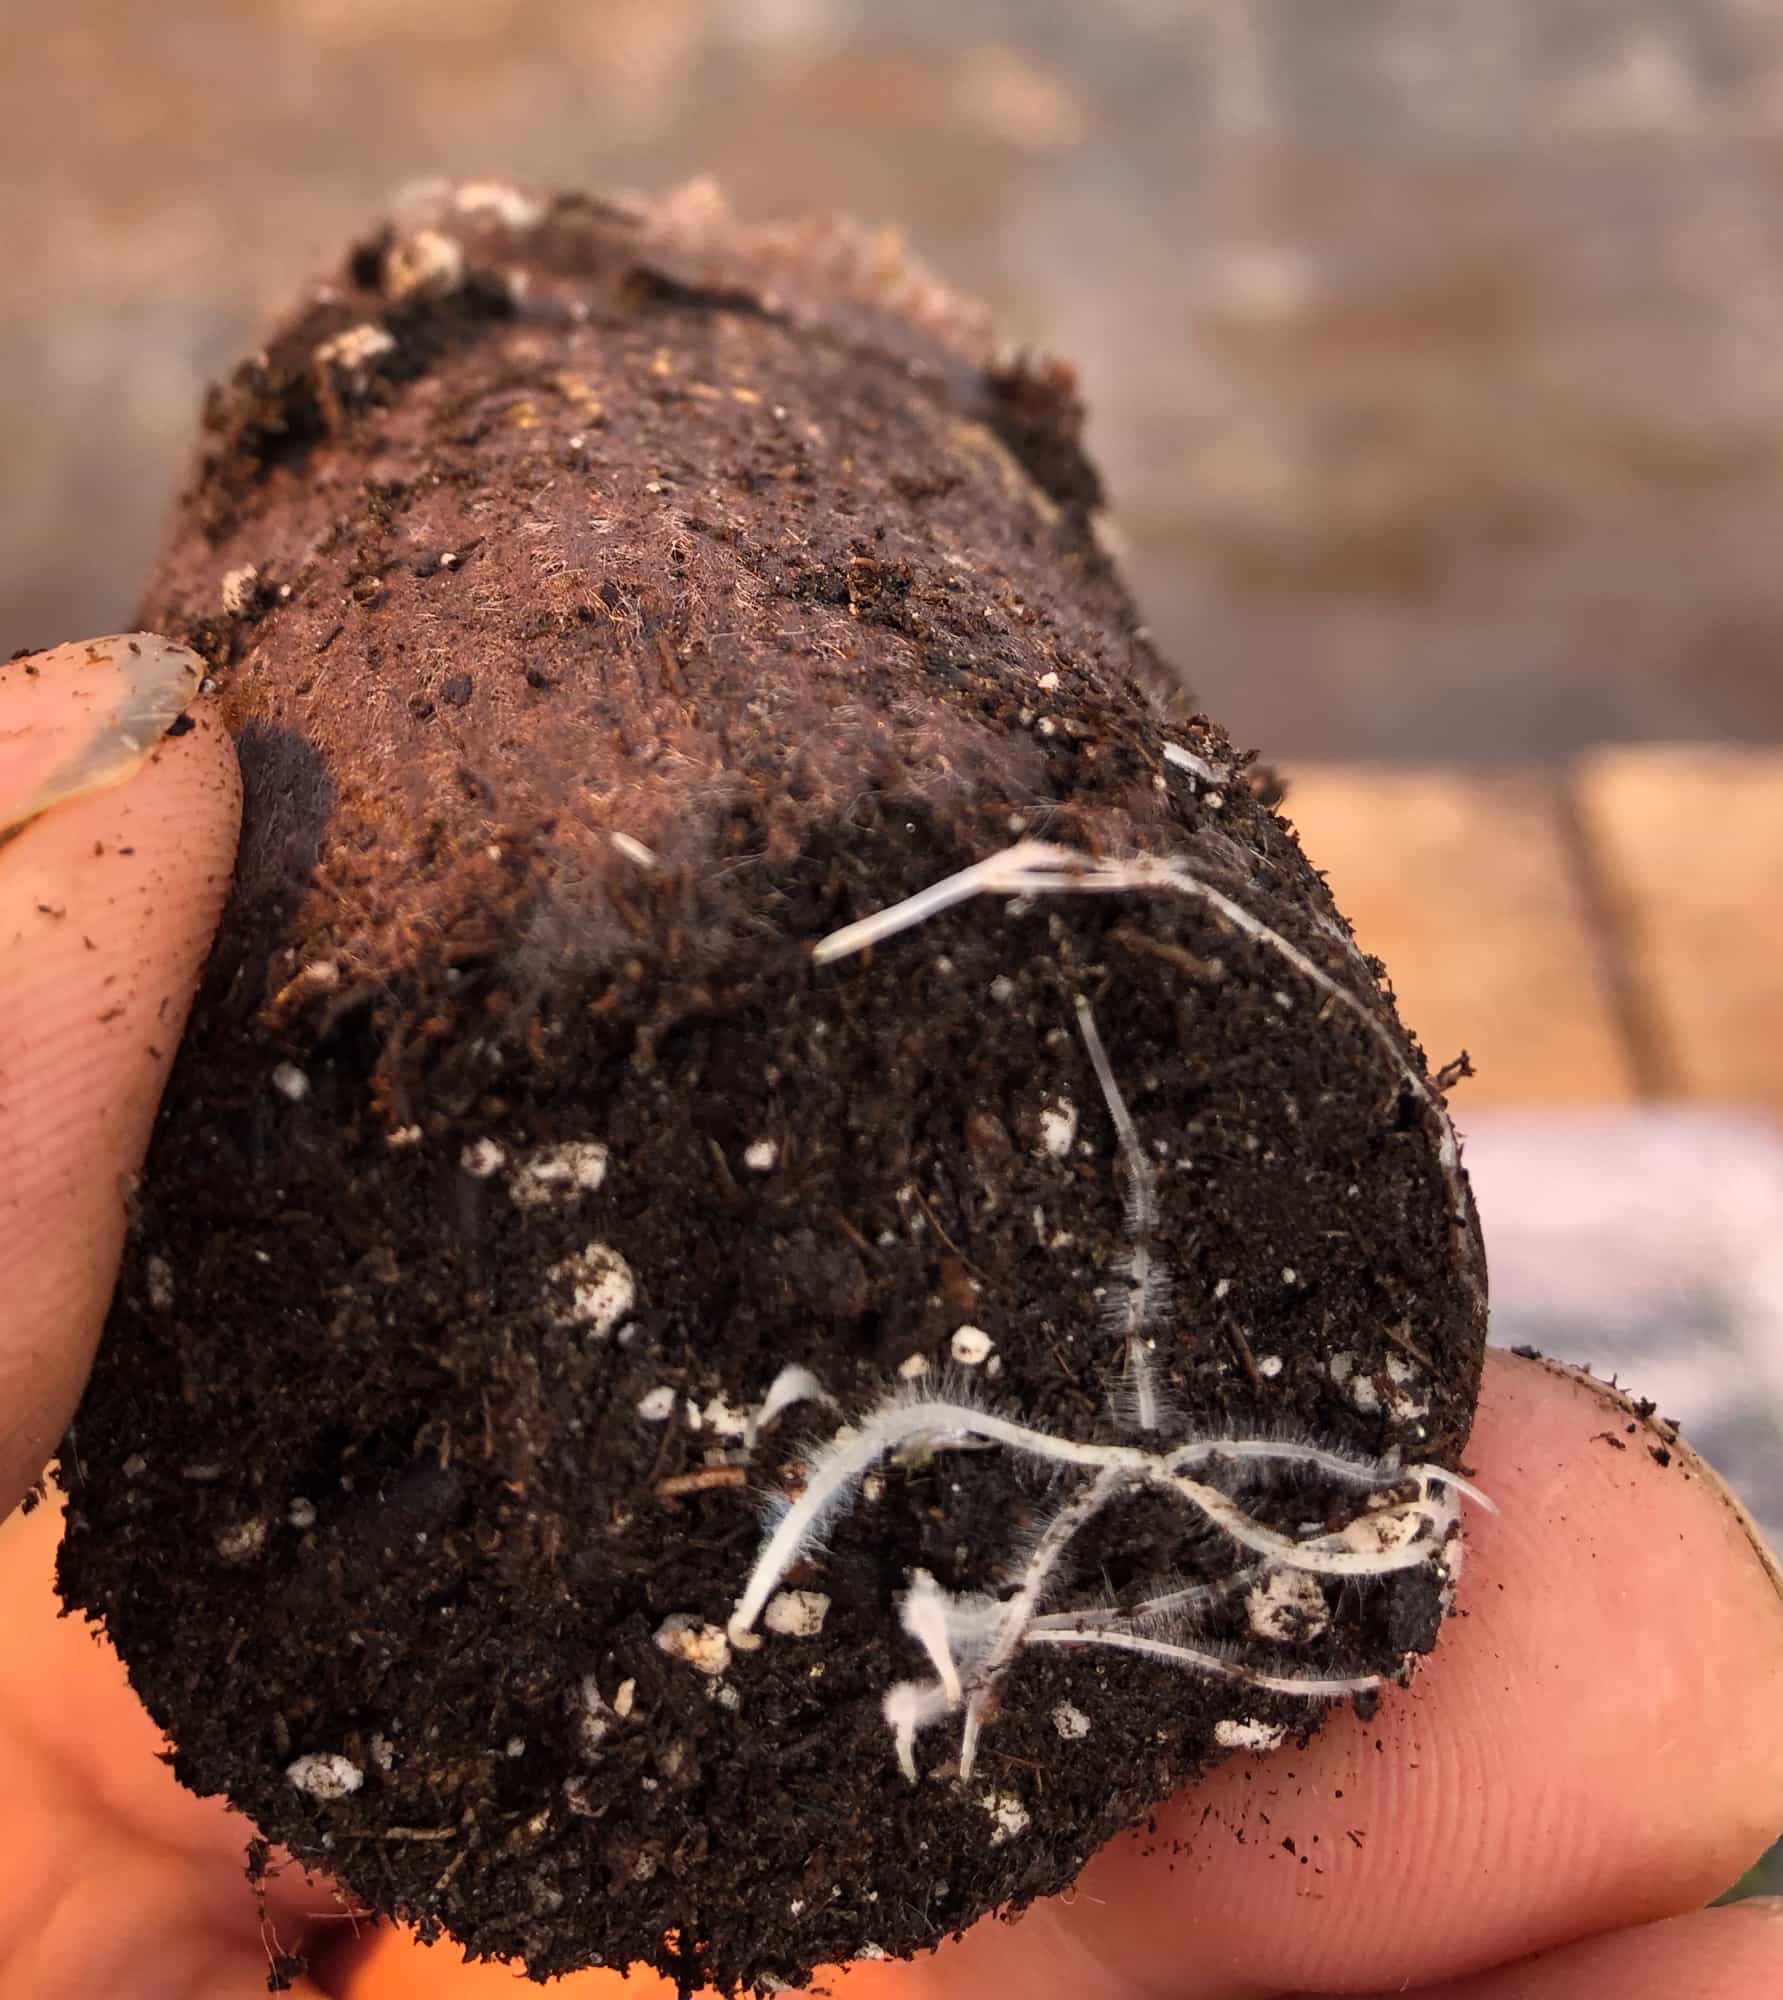
If autoflower seedlings become even slightly root bound, plants WILL flower regardless of how young they are. Four-inch tall colas are cute but unproductive, so be vigilant about checking plug bottoms for roots! Pictured above is what you want.
Additional Autoflower Starting Tips
We prefer to plant autoflower seedlings into the field at about 2-4” in height. If plants are deprived of light, they will grow tall and spindly, and may break during transplant or in the elements. If you are using pots as the final home - same thing, move them in when they are small.
Autoflowers are also very sensitive to their environments, and planting in cold weather or extreme heat can cause plants to go into flower prematurely.
Do your best to plan your planting schedule accordingly.
Let us help get you growing.
For a comprehensive collection of cannabis growing information, visit Oregon CBD at the links below.
There are many ways to grow a plant, but we have found these processes to be successful for us and farmers across the world. These recommendations are for all of our genetics, including CBD seeds, CBG seeds, CBDV seeds, THC seeds, THCV seeds, and Autoflower seeds.